Big Game Project; Week 4

For this week I planned a Pre-Alpha for our group in order to help us stay ahead of schedule. And for the alpha until the final stage we need to have our main features implemented.

The features that need to ready for this week, which also are our priorities for the whole game and our goal for GGC are:

  • Gesture magic, you move the analog controllers in a pattern to conjure magical spells.
  • Combining magic: After casting a spell onto the field which has a set duration time, you can hit it with another spell to combine it into a new spell with enhanced properties.
  • Harakat-Mode: bullet time mode where you take control over time to execute and combine magic.
  • Artificial intelligence (AI), Enemy behavior.

*Harakat in arabic means “movements”, or “stylized movements”.

Below ill present every area in short and also refer to their individual blogs for further reading in the areas that may interest you.

IMG_24042015_104946

Programming

AI
Enemy behaviors that are implemented for alpha involve chasing, attacking the player and have a range of vision. They can detect you by sound and has a guard area in which they return to when they stray too far from their area.

The boss “Qadher” is programmed to have different behaviors (attack patterns) when he reaches certain points of his health meter. A player needs to rethink strategies and make use of the spells in store.

For more reading regarding this matter read Ladbon´s blog

Controls
We have an alpha set up for the control buttons which will surely change as we iterate them further through play-testing.

But for now, this is how the input looks:

Opengametesting

This is only a mockup as we need to make the controls function properly. We need to get the main function of the analog sticks to be set for the alpha on Wednesday.

Read more about it in Herman’s blogg

Gesture Magic Casting
The analog controls for magic casting, has a script ready. What needs to be done for this is that the patterns need to be mapped for the player to cast spells that are assigned to them.
Magic Combination
The ability to cast the spell “fireflies” and hitting it with a “fireball”, which results in the spell “fire shots”, is written and ready as a script but we only have cubes placeholder for visual representations..

The lead programmer will further explain this matter in his blog, Oscar´s blog


Graphics

There is a lot of interesting visuals you should see in the artists individual blogs, you should visit them as I only write about their work and don’t show much of it here.

Animation

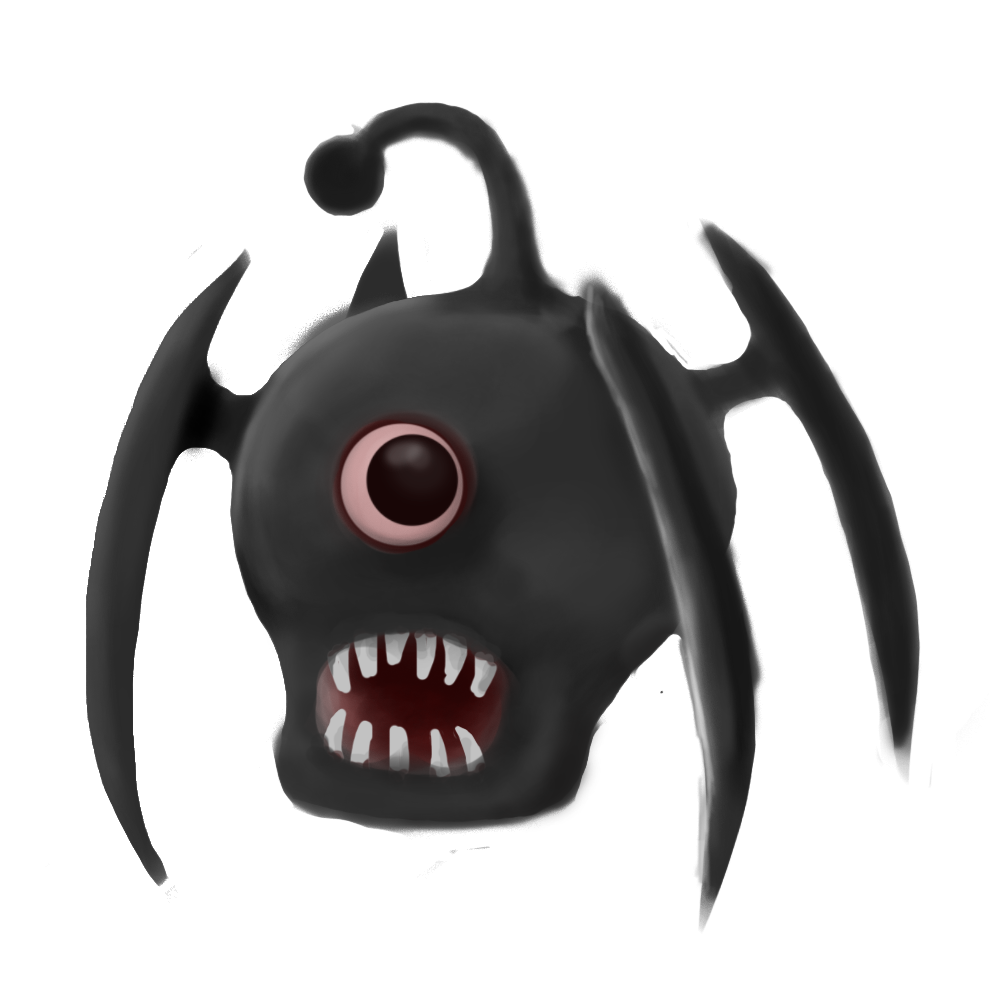
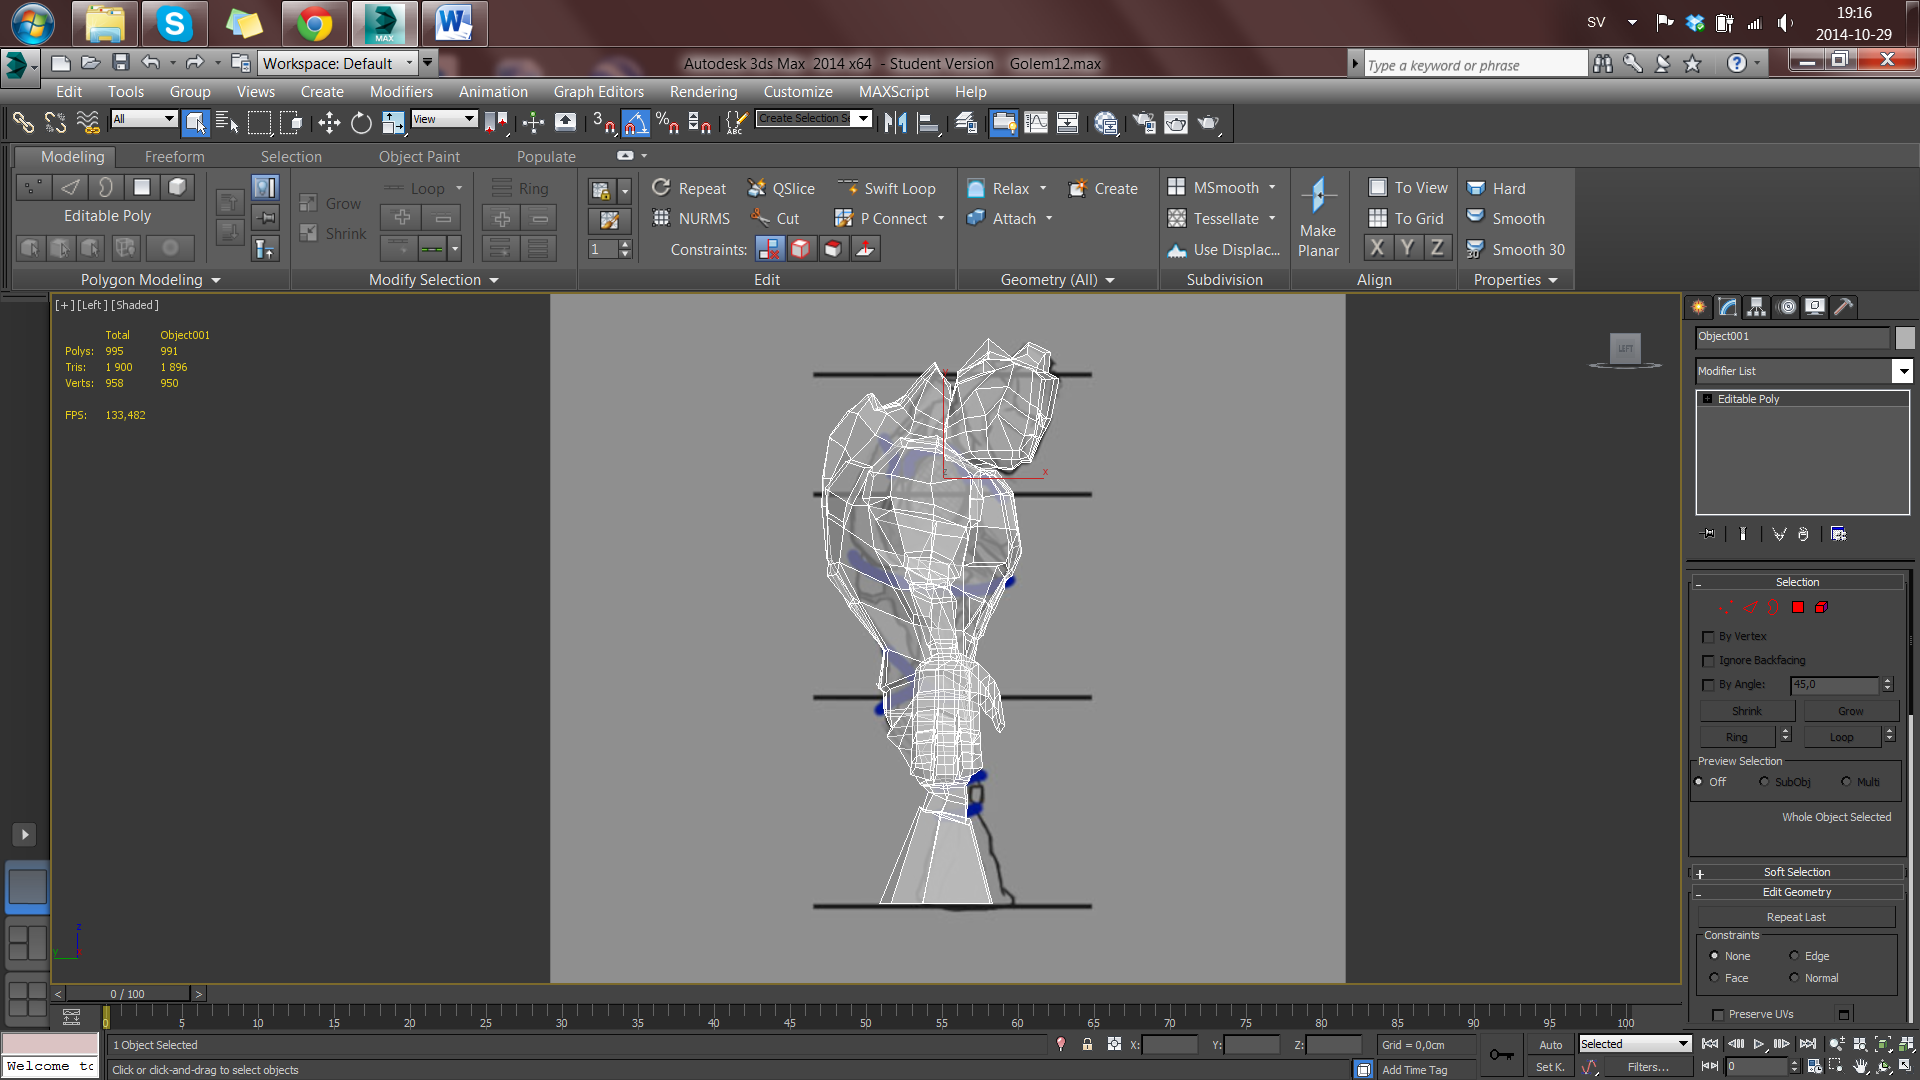
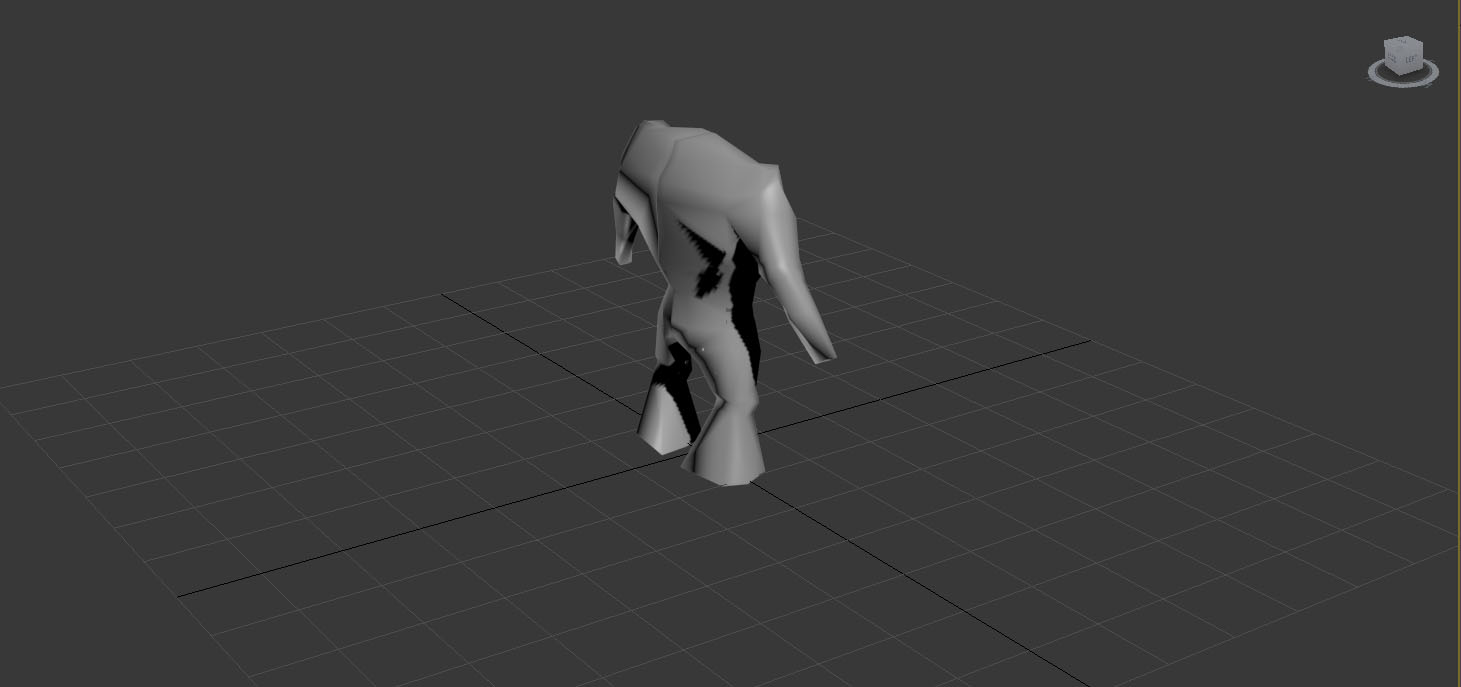
The animations for are mostly done, we have a spider that needs to be animated but we can’t do it in motionbuilder so we need to animate it in 3Ds Max, just recently we learned how to do that so unfortunately we may not be able to have it ready for Alpha. Mokhtar has some animations that need to be blended properly in Unreal Engine that should be only some small fixes, but for now we need to focus on features of the game rather than polishing the animations.

hashara

2D

Our Lead artist that also works as our concept artist, have provided us with a lot of art for our artists to follow. He makes a good job in representing the arabic style in artifacts and texts, he as gathered a lot of information and reference pictures that he and I have sat down and looked at.

I am not picky about it becoming 100% accurate but I want it to at leas be looking similar so that it gives the right feeling for our arabic influenced setting.

William´s blogg

3D

A lot of props are done, around 30 different stone shapes, mushrooms, the final mesh for our boss is being worked on and one extra enemy will have its base mesh done soon. And dont miss out on the bridges and other level based props he have prepeared.

Marcus blogg

Level

The level has the whole layout built, and should be placed in the alpha, later on we will make small changes in the level after we playtest it more. The level has still not been textured yet, but for now the lighting and some of the props are placed.

The level will always be under construction throughout the whole game developing process, so stay tuned by following Andreas blog below.

Andreas blogg


As far as we have come I can admit that I am a bit stressed as it feels like I am missing something, I tried to join the group as much as I could and help them out so I took it upon myself to learn how to animate in 3Ds Max to complete the spider animations, so far I’ve done a walking animation to 90% just need to do some final touches and try it in the engine and see if it works. If I get it up and running I’ll try to complete the rest of the animations; attack, idle and death.


The designing mission

I have a side assignment and that is also what I will be writing in my “post mortem”, that is about how I will try to teach the player about how to learn unconventional controls in an easy way, this and to make a short and understandable tutorial. I will write a bit more about it further in when we start to reach the Beta-stage.

So far regarding the controls in the pre-alpha stage, we haven’t gotten that far as the player can do some basic stuff like jumping and shooting a fireball but not doing the gesture moves with the analog sticks. But that was promised to be delivered for the Alpha on Wednesday, so I will have to keep track on what is done to make sure that it is done by then. But as far as I am concerned the control overall felt smooth according to the people that play tested it in school so that’s a good start I guess, and hopefully we will have something fun to play soon.

Next week will be a bit hectic for me as the I as a producer need to start attending presentation practices, and we still haven’t done much on the 2D side like for example the logotype for our game yet. But at the same time I don’t want to put too much pressure on our artists, so I’ll have to figure it out somehow.

Wish us luck for Alpha!

Final in assignment 3 Character Jorm is done!

And finally, the moment no one have been waiting for but me! The character model is done.
I added the texture and did a little finishing touch with the glow in the eyes and the liquid on his body! Moss and rock texture to resemble the rocky nature of him! And here we GOOOOO
Skärmdump 2014-11-06 16.14.37 Skärmdump 2014-11-06 16.14.49 Skärmdump 2014-11-06 16.14.55 Skärmdump 2014-11-06 16.15.23

And how i did the textures?

Assignment3_character_D
Diffuse map
Assignment3_character_G
The glow map This is the new thing i added to get the glow in Jorms eyes and liquids
Assignment3_character_N
Normal map Here I had to work a lot with inverting different things as i needed the light liquids to act as cracks. so i darkened them down before using the bump software “Insane bump” (which is free btw)
Assignment3_character_S
And the specular map, here as you can see… I did not want it to be shiny at all!

And finally how I went with the UV mapping

Skärmdump 2014-11-07 23.40.29
There was a lot of distortion in the map but I managed to fix everything by doing it manually, it took a lot of time but it was worth it!

Skärmdump 2014-11-07 23.39.43The 3D1 course is done and I hope that this was joyful for people to look at, next i will jump on to 3D2! lets see how that goes!


Assignment 3 week8

So I was not able to deliver this post last week as I was not finished with building the mesh, and I wanted to ask for help before posting this so that everything was “right” before I did it.
Now to how far I have come with this:

Skärmdump 2014-10-29 19.14.34 Skärmdump 2014-10-29 19.14.42 Skärmdump 2014-10-29 19.15.45 Skärmdump 2014-10-29 19.16.55 Skärmdump 2014-10-29 19.17.02

Now that the structure is almost done, soon I will have to apply the texture. I did some distortions on the picture as you can see, but Nils was okay with it so I continued doing it, and moved the legs a bit so that the golem could “keep the balance” as it was standing.

There, the final update for assignment 3 should be up soon I hope, I need to get the texture done and apply it, and hopefully it will be good!

3D1 3D Scanning

This week we tried to do some face scanning using photos added into “123D Catch”. One has to take several pictures from different angles and add it into the software which in turn adds all the pictures into one 3D model that one can work on. This 3D model would later on be imported to the 3D coating program. In the 3D coating program we try to apply poly surfaces to complete a human face that can be put onto a 3D modeled body.

As I scanned in my face in the 3D modeling program things got pretty ugly, but it was scary the way it worked. The first few times I had some missing surfaces on my face and I tried to connect everything trough the software, I had to redo it a couple of times before I got it right. After patching the face together I did not get a good result but I thought that I could use it only to apply polys and later on adding the texture. But then there was the problem with exporting the stuff from the “123D Catch” software to the 3D Coating software. I managed to import it once but I could not work on it as it disappeared all of a sudden, I tried it a couple of times but could not get it right, the time was running out so I had to skip working with my face and use an already existing one. Trying out a new software means that you have to learn all the commands for it, this took a lot of time too and also the process of how to actually work with the face to make it loop properly.

azkt1.3b
So with a 3D scanned head i try to bring out the structure of the model (the green polys)

azkt.3b

This is unfortunately how far I got, I will try to continue with this later when I get the time but right now I got too much on my plate. But as far as I understood the thing is that by using key landmarks one should be able to orient and make good use of the face “muscular” construction, and there are areas in the face that are actually similar to each other. The eyes and mouth follows the same form, but I could not do the cheek part right, I guess that this needs to be read into a lot more before I progress.

We were also advised to read the “Photogrammetry’ in ‘The Vanishing of Ethan Carter” article where they talk about how they used 3D scanning, and reading this game me a bit of insight of how future modeling can be used, it surely are a log way until we can use more polys in modeling but I think that this method would prove to be useful when we want to create realistic environment. They mentioned that they too had to lower the poly count as the original models would be too heavy to use, but they managed to still deliver the reality feeling. They suggest that with the use of 3D scanning we can capture details that we normally don’t think about adding, such as nature based effects on the environments that may have been shaping everything for more than a thousand years (As artist only try to design these things in a couple of days), this is something that may do a large impact on future modeling.

3D1 starting assignment 3 modeling

I have started the modeling of Nils character Jorm! And this is how far i have come:

sample
The back of the golem
sample2
And here we got the back of the golem


I am going to make some small adjustments but I am afraid to go ahead doing the hands now and head. Some more consulting with the teachers about this model regarding the head and hands would be needed. Another option would be to keep this save file if something would go horribly wrong, and continue with the modeling.

And next ill show you how far I have come with the assignment 2 (as this is assignment 3), which has its deadline this Sunday 19/10-2014.

These are the pictures of the edge flows, it was unfortunate that i missed class as she used this concept art to show how it would be done. But never the less, i tried it on my own and I hopefully did it right:

golemfront golemside

The next thing we would be doing is to model hands and the head and that is probably the hardest part of this (not thinking of the texturing part of this assignment) , I really would like this one to get the best result and I will try my best on it.


3D1 Assignment 2 final

This is how far I have come with the modeling and texturing of the knife.

KnifeUdk
The knife imported into UDK.
knifeD
Diffuse Map
knifeN
Normal Map
knifeS
Specular Map

This was the toughest one so far to texture, the modeling part was not that hard to do. But the thing that was hard was to unwrap the UV. The only hard part was the middle one where i wanted to cut it open into one piece, I sat down and tried it for two hole days until I became blinded by the cutting. So i decided to cut it into several different parts and edit everything in Photoshop to make it whole. Another mistake I made was to put the handle UV on top on of one another instead of separating them. My first thought about doing it was to minimize the work space but it turned out to be a a mistake as they didn’t appear to be symmetrical. I had a lot of help with texturing the middle part of the knife by my classmate Nils, as I was unsure of how to do it (I needed to recover some parts that was cloaked in shadow by the original picture).

But I was pretty satisfied by the results I got, and hopefully my teacher too. Wish me luck!

3D1 Character Turnaround

For this assignment i had to draw a character for my peer to model so here i go:

Mokhtar

Character Background “Mokhtar”

Name:

Mokhtar (“The chosen” one in arabic)

Nickname:

He is referred to as “Al-Saher” (Wizard in Arabic) by the people.

Gender:

Male.

Place and time:

Middleages, “Al Qariya Al-Hurra” (The free village), Kingdom of “Memlaka”.

Age:

Unknown. He has lived for a long time. Generations that has passed has seen him but he has never grown in appearance. When asked he answers: “A wise individual would not count his age in numbers, rather in the amount of wisdom one have”

Physical health/ attributes/ handicaps:

Even if he looks small and harmless, he possesses a great deal of power. He is a skilled user of ancient magic. It is said that he cover his eyes to strengthen all the other senses. “A man distracted by his sight is a man that cannot see past the shell of the reality”.

Movement:

Usually walks as a human, but when in battle he hoovers for better mobility and reach.

Appearance/ Hygiene:

Mokhtar wears a lot of expensive fabrics, he can afford it as the king would give him a lot of money for the bounties he brings in. Keeping clean is a top priority as he has to present himself in high standard.

Favorite food:

“He eats pretty much anything, but he seems particularly fond of apples, I wonder why that is…”

Intelligence:

He posses very high intelligence, he does a lot of research of new spells and incantations, trying to understand how everything works. He has a great thirst for knowledge.

Culture:

He has been around for a long time, even if he does not live as the villagers does he still knows of the customs. When researching people he often sits down in the village café and smokes “shisha” (Water pipe) and eavesdropping on people.

History:

They rumors say that he is a child of a great wizard and has manipulated time and space so that he can live on for ever. Some others claim that he is evil and he is the reason for the djinn appearing is because the mistakes done in his secret researches.

Religion:

It is said that he only knows one god, but he never attends at churches or mosques. He is mostly at his home whenever he´s not out hunting abnormal creatures.

Income:

All his money is gained by collecting bounties, so all the income comes mostly from the kingdom, but he also manages to collect some valuable stuff from his journeys.

Education:

This man is self-educated. He has a demand from the kingdom to provide with both gold and research material. He sometimes finds mystic books that contain a lot of new and valuable information.

Why did he/ she/ it (had to) choose this occupation?

He saw it as an opportunity to achieve money as well as gaining experience  throughout his journeys, the funds was only achievable through the bounty hunts.

Hobbies:

Trying out new spells and going out on journeys collecting new stuff or searching for new clues for greater spells.

Procreate:

He don’t have time for that.

Family:

None people know about.

Friends:

Friends as a distraction.

Inner rhythm:

To keep his magic in check he also need to control his feelings, but he sometimes gets to excited when he masters a new spell… let’s say that he had laid places to waste.. as some accidents tend to happen….

Psychology:

He has found his inner self pretty well. No enemy seems to shake him. But one…

His main goal in life:

Replace the creator

His biggest secret and why:

He is actually not human, he is a Djinn himself in disguise, and the reason why he fancies apples is because it reminds him of the apple of eden. He was created before men was created and he was angered when god created man. And he wants to create man and prove to everyone that man is worth nothing. No one knows of his secret yet, as he is the oldest of the “humans”. But the djinn knows who he is. The djinn wants to stop his plans that is why they appear in the human world.

About the game:

What platform(s) is it aimed at?

PS4, PC, XboxOne.

Who’s your target audience?

Exploration third person role-playing game. Ages 10+

Who’s your direct competition?

The legend of Zelda, Kingdom hearts, Fable

Parts

  1. Staff
  2. Turban
  3. Vest
  4. Harem pants
  5. Waistcloth
  6. Slippers
  7. A big fat moustache

3D1 Week 5, Assignment one hand in

So the diffuse map is the basic texture with all the color needed to make this “basket” wear the right colors. This is the first step and most basic texturing you need to do and will determine the outcome of the later maps. When you create a low poly count model you will still need to have some depth in your model, with the help of a normal map you can achieve that and it gives the illusion that it has a real texture. I used it to bring out the markings on the wooden plank as well as the nails keeping the wood together. The illusion of this makes the nails look like they are popping out of the crate when it actually is a flat surface if seen from the side. In a real game you do not use a high poly model, you reduce the amount of polys and add a normal map to achieve the final “illusion” result. The specular map help me to lower the shininess of the basket, as I do not want the planks to shine I drew these planks darker, and I added light to the nails so that they would get the shininess I was aiming for

The thing I realized and later on in the mapping became a problem was that I could not predict the outcome of the different maps (as I did not attend the lecture). So I had to try it out for myself. As I wrote before; the different maps has of course different “rules” and I started with only the diffuse map laying out the wooden texture, after I completed all three maps I realized another thing.. what holds a basket together? Nails…
I did not think it would matter at first, but it looked so fake that I could not live with it, so I did some editing in Photoshop, iterated a few times until I got it almost right. And then I was a bit satisfied with the result (for now).

As this was a pretty “simple” kind of crate, I did not need to think a lot of how and what had to be modeled and what to texture, our teacher showed us many times what should be modeled and not. So instead of actually modeling nails into the crate I just needed to texture the model with normal maps. So depth or stuff that needs to pop out does not always need to be modeled, the minor details done with texturing will become a good replacement for the loss of polys.

For my crate I wanted to skip the specular map as I heard that it makes stuff shiny, and I had wooden planks… I did not want them to shine, but actually it works the other way around too, if you darken the areas you do not want to shine, you will get a more matte material. But I also made use of the specular map for the nails I added to the basket.

basketfinal
The final result imported into UDK

So this crate was the final result, I rendered it in 3Ds Max at first but I was advised that i should import it to UDK instead to see how it would be presented in a game environment. I am pretty proud of this crate and i can see how much normal mapping does to an object, most of the “basket” is textured but it feels like I have modeled every little bump in it. one can achieve much through texturing only.

Diffuse
This is the Diffuse map
Normal
This is the normal maps, as you can see this is where the bumps and stuff happens.
specular
This is the specular map, light areas will shine and reflect more. but the dark areas wont.

The next assignment will be a tough one, we shall model and texture a knife. wish me luck!

3D1, week 2 assignment

For this assignment I will model some crates and chest to try to follow an art style and I will also discuss the similarities and differences in these styles. I will present three different themes:


Medieval

So going for medieval I tried to achieve the same feel as if we looked at a chest from like skyrim, if we want to folow the artstyle of the medieval era we often think of alot of wood, metal and leather. as this is me being the rookie and wanted to take the easy way first, I made this square  chest to visualize the typical style you see through out the game of skyrim. Here we got Metal workings and wooden planks, as skyrim are trying to achieve the realistic kind of chest. So man made crates in a realistic environment.

32153-3-1361494416-1921798281


And taking a little closer look at Assassins creed black flag, they use a lot of different crates so i wanted to try that out too. But still they use the similar stuff, that is the wood leather and metal. That is why i think that both Skyrim and Assassins creed portray that image pretty good.

C_Cumber1

As this was one of my first attempts at designing a chest, it took a bit more time than I had planned, I wanted to put some more detail on to the chest, as a pad lock etc, and I also wanted model the more advanced chest but it took like forever for me to do these ones. And as you see i attempted to model the first chest, as this has the basic box shape i thought that this one would be easy to start with, just to get a hang of it.

ChestSS


So getting inspiration from AC; black flag i wanted to try out some other crates for this, so first i made an ordinary rate, thinking that this may be something easy to texture later on. This crate is something that comes to my mind first, a crate that can be see in most of the games that try to achieve the realistic look, i wouldn’t say medieval thought, but it has the kind of old woodwork design.CrateWe can also imagine a lot of these small wooden baskets that often carries fruit etc. Now i would have wanted a bit more detail on these models, maybe find other ways to make them look professional, but the thing is that i still don’t possess all the knowledge i would have wanted for this. As I am still learning how to get around in the 3DS sofrware,
box


Cartoony
Now up for the cartoony section, as i misread the assignment i did not chose to try modeling the cartoonish  chests, but still ill try to analyse them. As you can see on the pictures i provided below the cartoony theme is close to chests seen in the reality but it also differs a bit, the shapes and colors are different, the previous chests were more rectangular, these have a more surrealistic style, bigger forms, bigger padlocks, a lot of round shapes etc. These chests in particular are taken from Zelda: Wind waker, as that verision of the franchieses art style was cartoony.

The_Wind_Waker_Link_waves_goodbye
20120915184420!Big_Treasure_Chest_(The_Wind_Waker) Spiked_Treasure_Chest_(The_Wind_Waker)Sci-fi
Metal, led lamps, lights and hard but tank styled art. Something that comes from outer space. A perfect example of that would be Warframe, looking at the chests here they look more digitally made, with metals and iron plates and light diodes like a spaceship. The different storage systems here does not have the traditional squares anymore, averything seems to be mechanical. The storage “box” at the second picture is something we cannot relate to at all (or maybe some can), but the lamps on the box draws the attention so we have to inspect it. These chests are portrayed more digital, like safety cases that can endure a lot of damage and bumps.Chest3.-Warframe-storage-container

Summerising

So well the only negative thing with this excersise was that i didnt get it in time to understand how to get it done, but anyhow. I still learned a lot from this assignment, how to model a chest by using different solutions, you can achieve any type of model you want, there is actually many ways you can solve a problem you have, i think much of it has to do with one willing to try, fail and learn from it. Sometimes it is just better to start from scratch than try to fix the model. The one i liked modeling the most was the “skyrim chest” even though i didnt add any detail i still managed to make it feel realistic, all this reminds me of carpentry class i had in highschool when i first built my own small chest. I would have wanted to make it so that i can rotate it, i mean like opening an closing the chest, but that has to do with joints and stuff, but we haven’t went through that yet.
Now paying attention to these elements of art one can better include them in the desired art style one thrives for, as it is essential to a game or a style to work as a complete unit, if something dont then it will pop out alot and the style will not be that atractive anymore. So its a bit confusing to see a cartoony chest in warframe… it would be better if we just recognize and stick to the appointed style.