Naar, Lets do it again!

Starting this year’s blog a lot later than I had planned, so let’s jump right into it without further delay.


Naar

After GGC we decided to spend our summer vacation far away from school activities, working and saving up money for our last year of Game design at campus gotland (Uppsala university). During the summer we attended at Intel buzz Workshop and presented our game there, mingled with a lot of new people and some which will be of use to us during this year and maybe even the future.

We decided that we would want to start over with Naar, and begin from scratch, starting off with character movements and working our way to casting spells and defeating enemies. We made a lot of research on similar games and looked at how they used their combat controls and camera movements, and we are going to try different methods to cast magic.


The previous demo will be available at our website but only playable with an Xbox-controller (or a similar gamepad). But a new version will also be available to test, and we will appreciate anyone who can help us by testing it and give us feedback on it. We will implement a keyboard layout so that it becomes more available for the majority to test. The new version will first start off with basic movements, so there won’t be any “action” but rather trying it out the character movement through an “obstacle course”.

Each time we iterate the prototype we will add it as new version of the game, and you will receive information about what has been added and adjusted, you can still comment on how you feel about different mechanics even though we moved on to the next step in the iteration.

The Naarative

In the GGC version of the game, we didn’t have the time to implement our narrative and that was a great loss according to us, we did not manage to deliver the right feeling to the game and often I had to explain the story, and if you as a developer need to explain a story, then you haven’t succeeded in delivering it from the start.

While we are testing out the mechanics for this version, we are working on how to implement a narrative for this game, the narrative is mostly written down but we are working on making cutscenes in the game to give the player a feeling of progression in the story.

Some new characters are also being worked on and we will start to animate for them as well. On our page you will be able to take a look at some concept art, and background information. We also have a developer blog that we are setting up and a webpage where each new version will be uploaded, Ill add a link to them as soon as we get it up and running.

Be sure to follow us and help us in the iterations, and hopefully this will become a fun experience for both parts. To keep track on where we are right now check out the facebook page: NaarTheGame.

Even more 3D

It has been a long time since I have been posting anything at all, it has been a hectic ride! I have been trying to post stuff here but haven’t had the time, but I have been posting “notebook drawings” on instagram.

There are two assignments I have completed, one is about photogrammetry and the other one was the final assignment for 3D2. So lets do this!

First off “Photogrammetry”, but lets us use a easier word; photo scanning!
Ill do a quick explaining for the ones who don’t know what it is, so basically you take a lot of pictures of one objective from different sides and angles, then you put those pictures into a program and allign them together and voila; youve got a 3d object ready. Well actually its not that easy you will have to do some more stuff to get it right and you will get a high poly model that you may want to make a low poly from.

Anyway, the assignment involved scanning an object, putting it in a virtual museum and present it in class. I scanned different objects but they did not turn out good at all, this was due to the problem with shiny surfaces, the software has a  hard time working with refection, so one have to take a lot of pictures to try to make it. I photo scanned an orange and it turned out looking like an orange muffin (I now realize that this I should have taken a picture of it). With nothing working out for me I made a last minute try and photos canned my shoe, and it turned out great!

shoe1 shoe2 shoe3

You can see the level of detail this brings, even if it doesn’t look exactly the same it is pretty close to reality. When photo scanning an object you will get the whole model done for you and also the texture will be put on top of that automatically, you can change the resolution of the texture detail within the software and other small adjustments you want to make. Usually one cant use this kind of high poly object inside a game as it would slow everything down, that is why one should make a low poly model based on the original model and apply the texture on top of the new model.
The things one can do with this kind of technique can be very useful when wanting to present old artifacts, or one can use this program and rebuild an artifact that has been worn out over time, and see how it would have looked back in the days.

So the second assignment involved choosing between modeling a telephone booth or a generator, this would later on be put in a scene and should also be presented in class. This was the hardest thing I have done so far, the amount of work and time put on this made me want to bang my head against a wall, when making this model I had more than 30 files saved if something went wrong (as the software tend to crash a lot and I would have lost two hours of work which happened a lot). And I also rebuilt the model several times, but this made me learn from it a lot too.

So everything i built in the scene is my own stuff;

Generator1 Generator2 Generator3 Generator4

So I was trying to recreate a street in the middle east, but didn’t manage to deliver the feeling before the deadline. And I got told that it would take a lot of time to achieve, so I modeled the street lights, the asphalt, the pavement and the brick house (which I am not proud of at all, but I liked everything else). I wanted to add dirt and stuff on everything but I never made it that far.

Lets dig deeper into the generator:

Gen1 Gen2

The amount of detail I had to think through with this one was giving me a headache, the texture work had to involve making the metal differ from the rubber materials. Most of the smaller details like bolts and smaller vents where done by using normal maps (Height maps giving the illusion that details aren’t flat).
Before handing the assignment in I added a collision box (without it a player can walk right through the model) and a light map (helps the engine saving memory when building the level and thus makes it work faster), that wasn’t that hard to do once you get the hang of it.

This was pretty much the update I had to deliver this time, this education turned out to become pretty difficult and we have a lot to do (Not so much visually to show). I am trying to get some drawing done but haven’t got the time, hopefully ill get the time soon enough, but until then.. ill try to post more.

This was the end of 3D2 and visualization in 3D, next up will be “serious games” and 3D3 and from what I’ve heard, its going to be a hell lot tougher from here.

Meanwhile you can just skim through my instagram here.

3D2 The next step

Hi!

I haven’t been posting anything for two weeks and this is mostly because i wanted to take a short brake after the previous courses where we had a lot to do, but i haven’t been doing nothing and for those who are interested you can see my drawing progress if you follow my Instagram.

Anyways, this week we have been going through texturing and how to apply it in games. The assignment for this week was to create tile-able textures, first material had to be metal and the second a non-metal. So here we go;

Skärmklipp 2014-11-22 16.35.13
Metal texture put in UDK4

Skärmklipp 2014-11-22 16.35.27

And as you can see i tiled it up and it looks repetitive to me, I redid the texture a lot of times but working with bare metal seem to be really hard and thought through. The thing with this screenshot is that i had zoomed it out a lot so it should not be this visible to a player as it is not going to be a floor tile.

Skärmklipp 2014-11-22 16.36.08
Marble texture inserted in UDK4

Skärmklipp 2014-11-22 16.36.35

Zoomed out the marble texture looks like blocks of chocolate, but in this I managed to get the detail i wanted and due to the “frames” it made it easier to tile as it would not be that seamless.

Hope I did not make you crave for chocolate! Have a nice one!

Final in assignment 3 Character Jorm is done!

And finally, the moment no one have been waiting for but me! The character model is done.
I added the texture and did a little finishing touch with the glow in the eyes and the liquid on his body! Moss and rock texture to resemble the rocky nature of him! And here we GOOOOO
Skärmdump 2014-11-06 16.14.37 Skärmdump 2014-11-06 16.14.49 Skärmdump 2014-11-06 16.14.55 Skärmdump 2014-11-06 16.15.23

And how i did the textures?

Assignment3_character_D
Diffuse map
Assignment3_character_G
The glow map This is the new thing i added to get the glow in Jorms eyes and liquids
Assignment3_character_N
Normal map Here I had to work a lot with inverting different things as i needed the light liquids to act as cracks. so i darkened them down before using the bump software “Insane bump” (which is free btw)
Assignment3_character_S
And the specular map, here as you can see… I did not want it to be shiny at all!

And finally how I went with the UV mapping

Skärmdump 2014-11-07 23.40.29
There was a lot of distortion in the map but I managed to fix everything by doing it manually, it took a lot of time but it was worth it!

Skärmdump 2014-11-07 23.39.43The 3D1 course is done and I hope that this was joyful for people to look at, next i will jump on to 3D2! lets see how that goes!


Assignment 3 week8

So I was not able to deliver this post last week as I was not finished with building the mesh, and I wanted to ask for help before posting this so that everything was “right” before I did it.
Now to how far I have come with this:

Skärmdump 2014-10-29 19.14.34 Skärmdump 2014-10-29 19.14.42 Skärmdump 2014-10-29 19.15.45 Skärmdump 2014-10-29 19.16.55 Skärmdump 2014-10-29 19.17.02

Now that the structure is almost done, soon I will have to apply the texture. I did some distortions on the picture as you can see, but Nils was okay with it so I continued doing it, and moved the legs a bit so that the golem could “keep the balance” as it was standing.

There, the final update for assignment 3 should be up soon I hope, I need to get the texture done and apply it, and hopefully it will be good!

3D1 3D Scanning

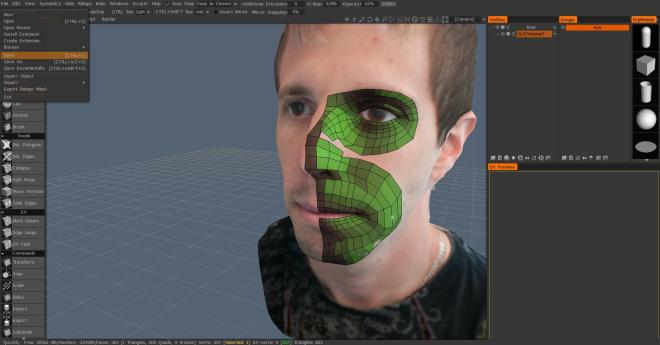
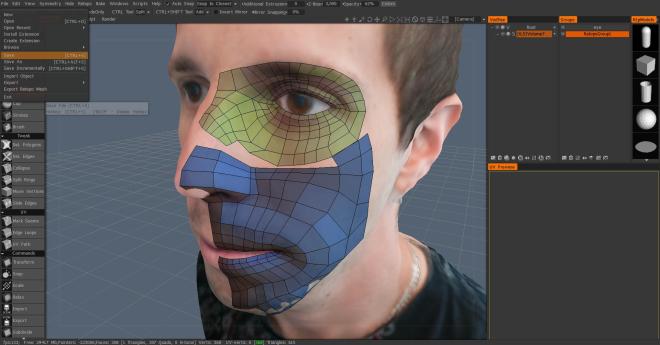
This week we tried to do some face scanning using photos added into “123D Catch”. One has to take several pictures from different angles and add it into the software which in turn adds all the pictures into one 3D model that one can work on. This 3D model would later on be imported to the 3D coating program. In the 3D coating program we try to apply poly surfaces to complete a human face that can be put onto a 3D modeled body.

As I scanned in my face in the 3D modeling program things got pretty ugly, but it was scary the way it worked. The first few times I had some missing surfaces on my face and I tried to connect everything trough the software, I had to redo it a couple of times before I got it right. After patching the face together I did not get a good result but I thought that I could use it only to apply polys and later on adding the texture. But then there was the problem with exporting the stuff from the “123D Catch” software to the 3D Coating software. I managed to import it once but I could not work on it as it disappeared all of a sudden, I tried it a couple of times but could not get it right, the time was running out so I had to skip working with my face and use an already existing one. Trying out a new software means that you have to learn all the commands for it, this took a lot of time too and also the process of how to actually work with the face to make it loop properly.

azkt1.3b
So with a 3D scanned head i try to bring out the structure of the model (the green polys)

azkt.3b

This is unfortunately how far I got, I will try to continue with this later when I get the time but right now I got too much on my plate. But as far as I understood the thing is that by using key landmarks one should be able to orient and make good use of the face “muscular” construction, and there are areas in the face that are actually similar to each other. The eyes and mouth follows the same form, but I could not do the cheek part right, I guess that this needs to be read into a lot more before I progress.

We were also advised to read the “Photogrammetry’ in ‘The Vanishing of Ethan Carter” article where they talk about how they used 3D scanning, and reading this game me a bit of insight of how future modeling can be used, it surely are a log way until we can use more polys in modeling but I think that this method would prove to be useful when we want to create realistic environment. They mentioned that they too had to lower the poly count as the original models would be too heavy to use, but they managed to still deliver the reality feeling. They suggest that with the use of 3D scanning we can capture details that we normally don’t think about adding, such as nature based effects on the environments that may have been shaping everything for more than a thousand years (As artist only try to design these things in a couple of days), this is something that may do a large impact on future modeling.

3D1 starting assignment 3 modeling

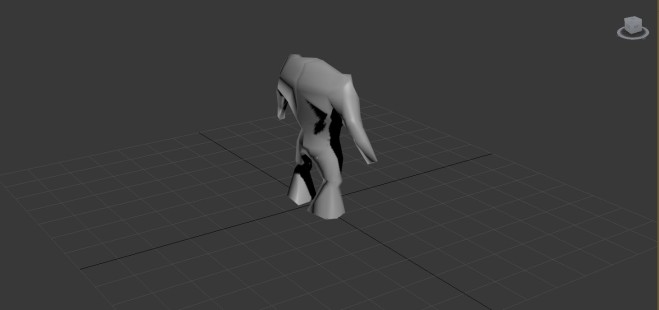
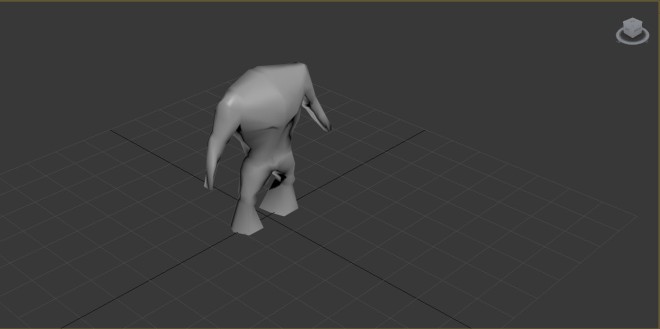
I have started the modeling of Nils character Jorm! And this is how far i have come:

sample
The back of the golem
sample2
And here we got the back of the golem


I am going to make some small adjustments but I am afraid to go ahead doing the hands now and head. Some more consulting with the teachers about this model regarding the head and hands would be needed. Another option would be to keep this save file if something would go horribly wrong, and continue with the modeling.

And next ill show you how far I have come with the assignment 2 (as this is assignment 3), which has its deadline this Sunday 19/10-2014.

These are the pictures of the edge flows, it was unfortunate that i missed class as she used this concept art to show how it would be done. But never the less, i tried it on my own and I hopefully did it right:

golemfront golemside

The next thing we would be doing is to model hands and the head and that is probably the hardest part of this (not thinking of the texturing part of this assignment) , I really would like this one to get the best result and I will try my best on it.


3D1 Assignment 2 final

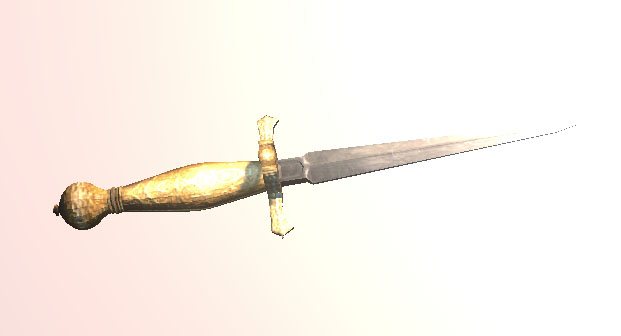
This is how far I have come with the modeling and texturing of the knife.

KnifeUdk
The knife imported into UDK.
knifeD
Diffuse Map
knifeN
Normal Map
knifeS
Specular Map

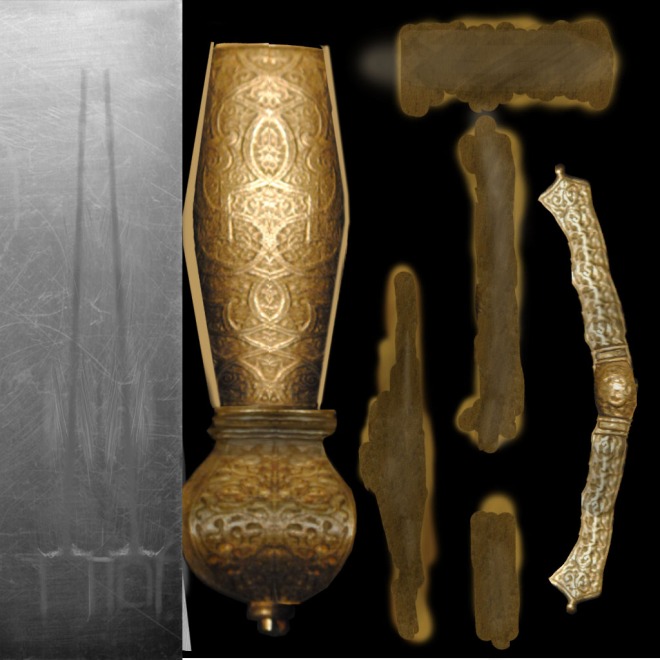
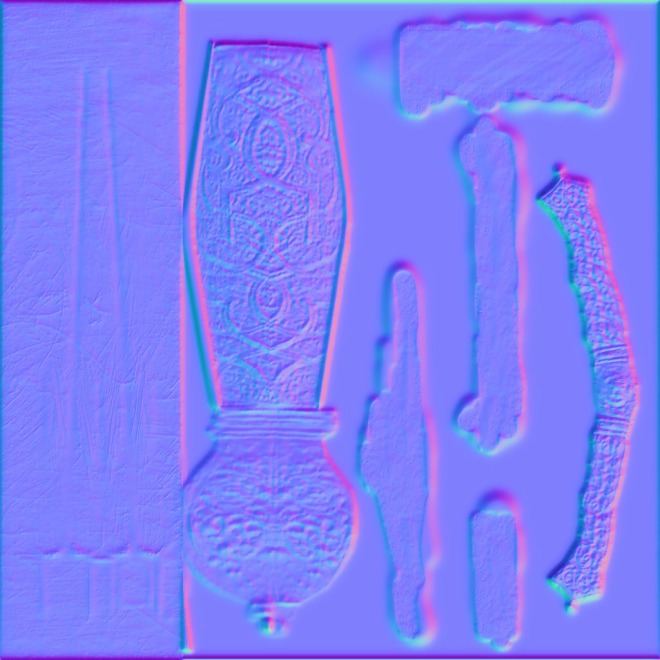
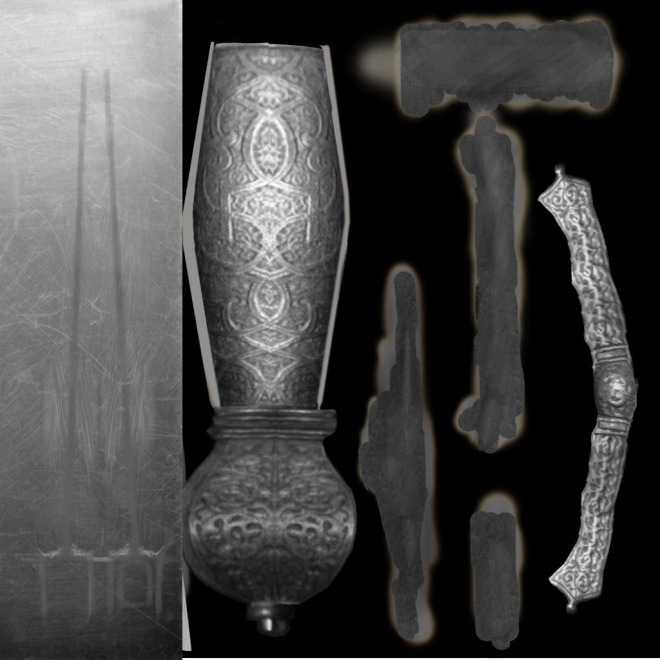
This was the toughest one so far to texture, the modeling part was not that hard to do. But the thing that was hard was to unwrap the UV. The only hard part was the middle one where i wanted to cut it open into one piece, I sat down and tried it for two hole days until I became blinded by the cutting. So i decided to cut it into several different parts and edit everything in Photoshop to make it whole. Another mistake I made was to put the handle UV on top on of one another instead of separating them. My first thought about doing it was to minimize the work space but it turned out to be a a mistake as they didn’t appear to be symmetrical. I had a lot of help with texturing the middle part of the knife by my classmate Nils, as I was unsure of how to do it (I needed to recover some parts that was cloaked in shadow by the original picture).

But I was pretty satisfied by the results I got, and hopefully my teacher too. Wish me luck!

3D1 week 7, Anatomy lecture

For today we started the lecture about anatomy where we at the end of the class gather in groups of three to give feedback on each other’s work ..

I had Camilla and Simon gave me feedback on my character construction. For the first character they mentioned the length of the legs in comparison to the length of the upper body, the legs where to short and I could not see it before due to my blindness of drawing too much on the body. So I started to count head lengths over the body and I saw that I needed to extend the legs a bit. I also got some notice about the neck, that was too long so I adjusted that bit too and it does look a little bit better now than before. This drawing is far from complete and it was not something I planned to do, I was sketching just to keep the “skills” up. I should have done a before and after picture for this but I managed to save it before doing so but anyway here it is:

fencer
This one was to be used to get feedback on

The second one I wanted to try out the muscle part throughout the lecture we had earlier today, so I let them look at it and give me some comments on it, as for this picture there was nothing more than the size of the head but as it was a rough and quick sketch I took it as something I had already taken it into consideration and quickly just redid it:

muscle
Rough muscle sketch, concentrated on drawing half of the body to try it out.

I need to study more about muscle orientation, how they look when they expand or retract. When I draw my characters I try to keep a posture that would be close to reality as I can, but the thing with it is that I learned that only by figure drawing. If I learn how and where to apply muscles I can make a more realistic body for my characters. This would also be applicable on cartoonish characters later on if one wants to not distort from a balanced structure. And if I know how the muscles of humans work then I may even be able to understand the animal world too. Pretty much of the reference I need could be obtained from searching through google for pictures regarding muscle anatomy. I will also keep on reading the book Art Fundamentals, this book gives a really good perspective on drawing anatomy and I think that this is a book an artist should have in the shelf.

Okay so for the next few months I will try to keep on trying to draw muscles from pictures to learn to handle proportions. I guess using my sketchbook more for this matter should be useful as I have to keep this going for future modeling. As going for the next assignment when dealing with character modeling, we are going through the anatomy of the human body, today we had the lecture regarding the body and we will go through the face muscles for last as it is the more complex part of the human body. Hopefully I will get more confidence regarding 3D modeling as I personally think that this business is really difficult, if I get good at this then hopefully it will be more fun to do. The hardest part about all this for me is the texturing, I don’t know if I would call it the hardest but I really don’t like it. But I should just maybe do some modeling of smaller objects just to make it more interesting.

3D1 Assignment 3, Preperations

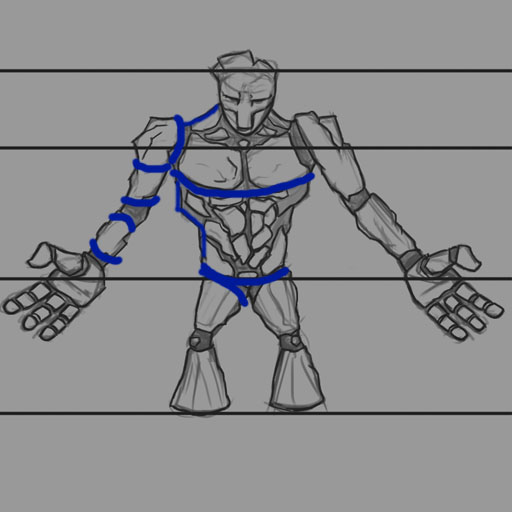
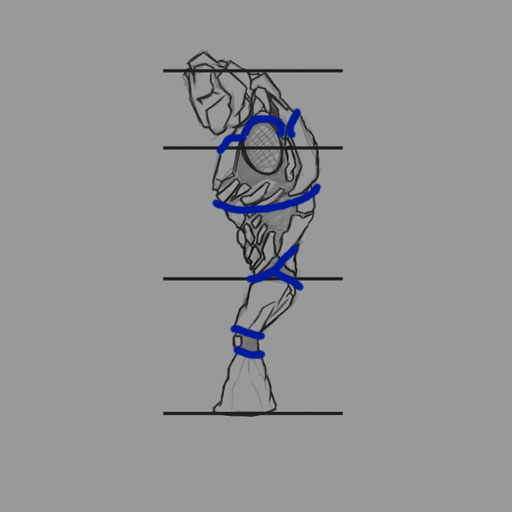
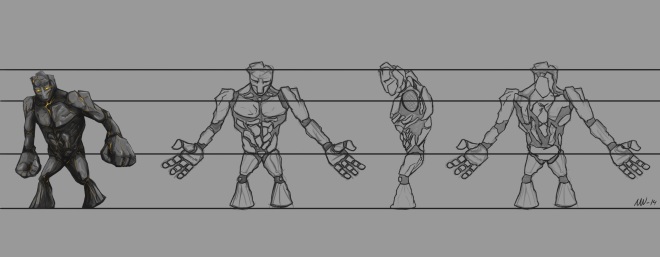
For assignment 3 on our 3D course I will have to model and texture a character that my college Nils drew. Before that I had to know everything there is to know about his character. So I was handed this character background sheet, concept art and turn around:


stone golem turnaround
Artist: Nils Wennergren Check out his blog here


  • Name:  It has no name that can be pronounced by humans, through folklore since the dawn of time this one has been called Jorm.
  • Gender: 
  • Age:  The beings are mentioned in the earliest accounts of civilization, they are said to have been created by the goods to keep watch over the realms of good and guard them from the dark forces that wishes to take over the world. Some even say that the gods have forgotten them in this realm, and that they now just wander aimlessly in search of their creators.
  • Physical attributes/ Health/ Handicaps: These beings are very large, reaching heights well above the tree tops and they are also incredibly strong. They are however not very quick to react and seldom make any hasty movements, but once they build up momentum they can move with terrifying speed.
    the only known weaknesses that they have are contact with lava and deep depressions that renders them immobile and sometimes falling asleep. Many of the hills and land formations around the world are actually made of these forgotten giants.
  • Movement: As said before they are slow to react, but can build up incredible momentum given time. They seem to have certain migration patterns, but the motivation behind the patterns are unknown.
  • Appearance/Hygiene: The appearance of these giants can differ a lot both in size and shape and with that their physical attributes as well. Jorm does not seem very concerned with his appearance, of course he does not abide by the same framework for vanity and attraction as humans. Most of the giants seem to not question the way that they are made, they just “are” in the sense of physical beings.
  • Favorite food: The giants gather their life force from the earth itself, the core of that force is located at their hearts. As long as the core is active they are able to move their bodies, if the core is dampened by sadness or lack of energy the body will become immobilized and frozen.
  • Intelligence: Little is known of their intelligence, as no one seems to understand their language. It appears as though they communicate with each other through low rumbling sounds that makes the ground shake. To hear them rumble is however very rare these days, seen as there are so few giants left and they hardly ever cross paths anymore.
  • Culture: There are only speculations.
  • Temper: Jorm has a very calm and contemplative personality, He has been known to just sit and watch the passing of the seasons for years just contemplating the beauty of it all. When provoked enough however Jorm has been known to obliterate entire armies of soldiers trying to bring the giant to its knees.
  • About the game:
  • Platform: xbox, play station, PC.
  • Target audience: Achievers, explorers, ages 12 and up.
  • Direct competition, 3 titles: “Shadow of the Colossus”, “Skyrim” and “Dragon Age”.
  • Game description: An ancient evil has returned to the world, slowly creeping forth in the shadows. This evil was in the dawn of time defeated by the might of the great giants, but the giants have since then decade to the point of near extinction.
  • In this game it is up to the main character to find the power to raise the giants once more and restore their will to live and to fight off the evil that threatens the world. The narrative will be partly a classical hero’s journey, and partly a reflection of lost respect for the wonders and magic of nature.

I will ask him more about the specifics about some minor things about details, but he has managed to make everything look good and not confusing. (And I also want to thank him for not putting on accessories!)

So when I start to model this I may need to build some of the things as separate objects for starters, this is just to be extra careful when doing this and minimize the risk of having to rebuild the entire thing from scratch. I will also ask my teacher for any hints or tips regarding the modeling.


The thing I am concerned about the most is the texturing part, I think that most of the things like the muscles and cracks can be done by using normal maps, and the yellow lights (or cracks) would be done with specular maps. Then I guess that I have to think about the silhouette when creating the head and shoulder parts. The thing with this character that I personally think would take the most time is that it’s not symmetrical so if I would want to duplicate the sides I still have to work on silhouette details on the body, I don’t know what would be wise to do in this situation.

As the character is an ancient “being” he would be residing on a more isolated and nature filled landscape, I have to take his rocky body into consideration and hopefully I will manage to maintain his art style. He would be like pointing out things on my work and I hope that he will be pleased by the results I get from this!